
This was a great article released by the Exchange Team Blog today, and as I have been dealing with MANY customers still having Exchange 2010, I wanted to have this available for quick review! It has great links and steps to consider when finally getting off Exchange 2010.
Best practices when decommissioning Exchange 2010
As many of you know from the previous post regarding Exchange On-Premises Best Practices for Migrations from 2010 to 2016 the end of support for Exchange 2010 is quickly approaching. We’ve created this post to cover the best practices for decommissioning an Exchange 2010 environment after the migration has completed.
Uninstalling Exchange 2010 is as easy as running Setup and selecting to remove the server roles, but there are prerequisites to removing the roles and legacy items left over, which should be removed.
This post is intended to provide best practices to plan for and complete the Exchange 2010 decommission. Please note that since there are many different types of deployments and configurations it is difficult to cover all scenarios, but many of the common steps are included here. Please plan the decommission process carefully.
As a general statement, here are some things that we want to caution against:
- Do not reuse Exchange 2010 server names (until they have been fully decommissioned).
- Do not reuse Exchange 2010 server IP addresses (until they have been fully decommissioned).
This post assumes that your organization is maintaining some Exchange presence on-premises, whether Exchange 2013 or 2016 (we do not mention Exchange 2019 in this post because it cannot coexist with Exchange 2010). If your organization has moved all mailboxes to Office 365 and is in a Hybrid environment, we are assuming you will maintain an Exchange footprint per Scenario 2 in How and when to decommission your on-premises Exchange servers in a hybrid deployment.
Preparing for Soft Shut Down
Once you’ve completed the migration from Exchange 2010 to, let’s say, Exchange 2016, you should prepare the 2010 environment prior to decommissioning the servers. The following steps to consider are separated into server roles when preparing for a soft shut down and preparing for the removal of server roles.
Client Access (CAS) Role
Check Server FQDNs
Review all namespaces (e.g. DNS records and load balanced virtual IP addresses) used for client connectivity and ensure they are routing to the 2016 environment. These are all the names that are published for Outlook Anywhere, AutoDiscover, and all Exchange Virtual Directories.
Tip: Verify that all clients such as ActiveSync, Outlook, EWS, OWA, OAB, POP3/IMAP, and Autodiscover are no longer connecting to the legacy Exchange servers. Verification of this can be done by reviewing the servers’ IIS Logs with Log Parser Studio (LPS). LPS is a GUI for Log Parser 2.2 and it greatly reduces the complexity of parsing logs. LPS can parse large sets of logs concurrently (we have tested with total log sizes of >60GB). Please refer to the following blog post with tips and information on using LPS.
Check SCPs
Make sure that the Service Connection Point (SCP) is moved to Exchange 2016 as discussed in the Exchange On-Premises Best Practices for Migrations from 2010 to 2016 post under the Configure Autodiscover SCP for Internal Clients section.
1 | Get-ExchangeServer | ? {$_.AdminDisplayversion -like "Version 14.*" -and $_.IsClientaccessServer -eq $true} | Get-ClientAccessServer | Select Name, FQDN, AutoDiscoverServiceInternalUri |
If present, ensure that if the AutoDiscoverServiceInternalURI routes to an Exchange 2016 endpoint. You can also remove this value by setting the AutoDiscoverServiceInternalURI to $Null.
1 | Set-ClientAccessServer -Identity <Exchange2010> -AutoDiscoverServiceInternalURI https://autodiscover.contoso.com/AutoDiscover/AutoDiscover.xml |
Hub Transport Role
Follow the items below to review all mail flow connectors. We will not be removing connectors themselves, simply auditing to ensure that the server is ready to be decommissioned.
Review the Send Connectors
Review the send connectors and ensure that the legacy servers have been removed and Exchange 2016 servers have been added. Most organizations only permit outbound network traffic on port 25 to a small number of IP addresses, so you may also need to review the outbound network configuration.
1 2 | Get-SendConnector | Select Name,SourceTransportServers Get-ForeignConnector | Select Name,SourceTransportServers |
Review the Receive Connectors
Review the receive connectors on legacy servers and ensure they are recreated on your Exchange 2016 servers (e.g. SMTP relay; anonymous relay; partner, etc.). Review all namespaces (e.g. DNS records and load balanced virtual IP addresses) used for inbound mail routing and ensure they are terminating against the Exchange 2016 environment. If your legacy Exchange servers have any custom, third-party, or foreign connectors installed (for example, with fax services), ensure that they can be reinstalled on 2016 Exchange servers.
1 | Get-ReceiveConnector -Server <ServerToDecommission> |
Tip: Check the SMTP logs to see if any outside systems are still sending SMTP traffic to the servers via hard coded names or IP addresses. To enable logging, review Configure Protocol Logging. Also, ensure we have “time coverage” for any apps relaying weekly/monthly emails that may not be caught in a small sample size of SMTP Protocol logs. There is a great script available here that can help find any applications that may be relaying off your legacy environment.
In general, the decommissioning process is a great time to audit your mail flow configuration to ensure that all the connectors are properly configured and secured. Maybe it’s time to get rid of any of those Anonymous Relay connectors that may be in use in your environment. Or, if Hybrid, possibly relay against Office 365.
Transport Rules
Exchange 2010 base transport rules are held in a different AD container than Exchange 2013 and newer rules. When installing Exchange 2016 in your environment it will import those Exchange 2010 based rules. However, any changes to Exchange 2010 rules after a later version of Exchange is installed must also be applied to your Exchange 2016 rules. This is further explained here under section Coexistence with Exchange 2010.
Run the following command to get all your Exchange Transport Rules. Must be run on Exchange 2016 to see all rules.
1 | Get-TransportRule | Select Name,RuleVersion |
Compare the rules with RuleVersion of 14.X.X.X to those with 15.1.X.X. If any Exchange 2010 rules don’t exist on Exchange 2016, they must be created. Also review all settings of each Exchange 2010 rule and replicate them to Exchange 2016.
Mailbox Role
Identity and move all Exchange 2010 mailboxes to Exchange 2016
Decommissioning Exchange 2010 cannot be initiated until all mailboxes have been moved to Exchange 2016. As an example, we cannot decommission Exchange 2010 Hub Transport servers completely until all of the mailboxes are moved off the legacy platform, this is due to how Delivery Groups are handled.
We encourage using the newest Exchange platform to process any move requests. If moving to Exchange 2016, move all mailboxes via Exchange 2016. Also, ensure that once all moves are completed, and that all associated Move Requests are removed as well. Any lingering move requests or mailboxes will prevent uninstallation of Exchange 2010.
To move all user mailboxes, run the following command to identify the mailboxes, and then plan to move them to the new platform.
1 | Get-MailboxDatabase -Server <ServerToDecommission> | Get-Mailbox |
Tip: Ensure that Archives are included with “Get-Mailbox -Archive” if you used Exchange Archives in 2010. Also, do not forget about your Discovery Search mailboxes – these can be found with: Get-Mailbox -Filter { RecipientTypeDetails -eq “DiscoveryMailbox”}. These will need to be moved (if they haven’t yet already), to Exchange 2016 as well.
Identify and Move Arbitration Mailboxes to Exchange 2016
It’s necessary to move the arbitration mailboxes from Exchange 2010 to 2016 for many Exchange Services to work properly, including the Exchange Admin Center (EAC). This is typically executed when Exchange 2016 is first installed, however, if that was missed, we will ensure that is handled now. The process to move is defined at: Move the Exchange 2010 system mailbox to Exchange 2013+. To verify which system mailboxes are located on 2010, use PowerShell on your Exchange 2010 server with the following example:
1 | Set-ADServerSettings -ViewEntireForest $true Get-MailboxDatabase -Server <ServerToDecommission> | Get-Mailbox -Arbitration |
Note: If any mailboxes are present, move them to an Exchange 2016 database.
OAB Generation
Installing first Exchange Server 2013+ into Exchange 2010 organization creates a new OAB. It also marks the new OAB as default. The Exchange 2010 OAB is not used by Exchange 2013+ servers so moving the OAB is not necessary. Move the OAB to another Exchange 2010 server, if you are removing an Exchange 2010 server that’s currently hosting the OAB, and there are other Exchange 2010 servers in the org. If you are removing the last Exchange 2010 server in the org, remove the OAB.
Migrate All Legacy Public Folders
Verify that all the public folders have been migrated to Exchange Online, Office 365 Groups, or Exchange Modern public folders.
Mail Enabled Public Folders (MEPF) consideration
If the following is true:
- Exchange Server 2010 public folders are migrated to Exchange Online
- Exchange Server 2013/2016 was introduced on-premises
- MEPF’s are still used on-premises to send emails to Exchange Online
In that case, you may need to run the SetMailPublicFolderExternalAddress.ps1 script to ensure Exchange 2013+ servers can continue sending emails to Exchange Online MEPFs.
Decommission the Database Availability Group (DAG)
Assuming best practices were followed for the Exchange 2010 environment, we will have a DAG for HA/DR capabilities. Now that all mailboxes have been removed from the 2010 environment, we are ready to tear down this DAG to move forward with decommissioning Exchange 2010.
Remove Database Availability Group (DAG) Copies
First, we start with the copies. For every mailbox database copy in the environment hosted on Exchange 2010, we will need to remove the Mailbox Database Copy. This can be done via the UI, or via PowerShell:
1 | Remove-MailboxDatabaseCopy -Identity <DatabaseName>\<ServerToDecommission> -Confirm:$False |
NOTE: Removing the copy will not remove the actual .edb database file from the Server.
Remove All Nodes from Database Availability Group(s) (DAG)
For each Exchange 2010 server in the environment, we will need to remove the individual server from the DAG. This is evicting the server from the cluster. This can be done via the UI, or through PowerShell.
1 | Remove-DatabaseAvailabilityGroupServer -Identity <DAGName> -MailboxServer <ServerToDecommission> |
Remove DAGs
Lastly, once the Database copies are removed, and the servers are evicted from the cluster, the last thing is to finally remove the DAG from the environment. This can be done with the following PowerShell command:
1 | Remove-DatabaseAvailabilityGroup -Identity <DAGName> -Confirm:$False |
Tip: If you have an even-membered DAG, and leveraged a File Share Witness, don’t forget to decommission the file share witness that was used for the Exchange 2010 DAG.
Unified Messaging Role
Configuration steps are required to move Exchange 2010 UM to Exchange 2016 servers. The following link can be used to guide through removal of UM from Exchange 2010. If moving to a third-party UM solution, remove the UM components to allow un-installation of the UM role.
Edge Role
If you have an Edge server, you will need to install Exchange 2016 Edge and recreate the Edge Subscription on the E2016 server. This is further documented here.
Other
As mentioned in the beginning of the document, due to so many different types of deployments and configurations, it’s difficult to cover all scenarios however it’s recommended to check any other possible scenarios that apply to your environment.
Third Party Applications
Make a list of applications that may be using Exchange 2010 (e.g. EWS, mail transport, database-aware) and make sure to configure these applications to start using Exchange 2016 infrastructure.
Shut-Down Exchange 2010 Servers
Test shutting down the Exchange servers for a few days to a few weeks to see if there are any issues. You are auditing for any applications that are trying to connect to the Exchange 2010 servers or trying to send email through the Exchange 2010 servers. Enabling protocol logging on the Hub Transport roles prior to shutting down the servers is an option. That way if any mail is processing through these servers, upon restart, the logging will begin immediately. If applications or servers are trying to connect you can remediate those or power on the Exchange 2010 servers until remediation can happen.
Tip: Check Active Directory DNS Zone settings to see if DNS Scavenging is enabled. If this is enabled, the DNS record could become stale during the shutdown time frame and cause DNS issues for the Exchange 2010 server.
Preparing for Removal of Server Roles
As you begin the process of removing servers, you should go through the list below and ensure you have everything tested and ready to go.
CAS
Remove CAS Arrays
Remove Any Exchange 2010 Client Access Arrays from Active Directory and DNS. Refer to the following document to remove the Client Access Array object with Shell using the following example:
1 | Remove-ClientAccessArray -Identity casarray01.contoso.com |
Be sure to also remove any references in DNS to the CAS Array Name.
Remove Unused 2010 ASAs
If you followed either the Best practices for Migrations blog or the Coexistence with Kerberos blog, we recommend that any old alternate service accounts (ASAs) used for E2010 be removed. If you are using a different namespace than Exchange 2016, please verify old SPNs are also removed.
Remove Exchange 2010 OAB
Use the following command to remove Exchange 2010 OAB:
1 | Get-OfflineAddressBook | ?{$_.ExchangeVersion -like "*14*"} | Remove-OfflineAddressBookMailbox |
Remove Mailbox Databases
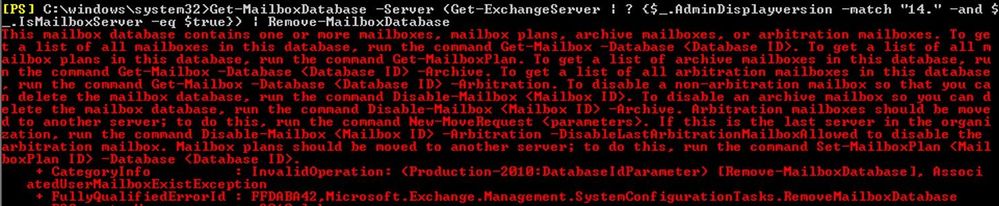
Now that all mailboxes are migrated from the Exchange 2010 platform, and the DAG is properly removed, we will want to decommission any leftover databases from the Exchange 2010 environment. To remove all Exchange 2010 databases, review the output of the following, and remove individually:
1 | Get-MailboxDatabase -Server <ServerToDecommission> |
And then remove the database with:
1 | Remove-MailboxDatabase -Identity DB1 |
NOTE: If there are any mailboxes currently residing on the database, we will not let you remove the database, it will fail with the following error:
Remove Legacy Public Folders
If you chose not to migrate public folders, refer to the following document to remove public folders with either EMC or Shell using the following example:
Remove Legacy Public Folder Databases
Refer to the following document to remove the public folder databases with PowerShell using the following example:
1 | Remove-PublicFolderDatabase -Identity "PFDB01" |
Tip: Remember the .edb files linger after the above is done. Feel free to delete, backup, or do with these as you please.
Uninstall Exchange 2010
It’s recommended to uninstall in the following order: CAS, Hub, UM (if any), then Mailbox.
Starting the Uninstall Process
When you begin the uninstall process, close EMC, EMS, and any additional programs that could delay uninstall process (i.e. programs using .NET assemblies; antivirus and backup agents are examples). You can either run Exchange 2010 Setup.exe or navigate to Control Panel to modify or remove Exchange 2010 (either server roles or the entire installation). Specific steps are discussed in Modify or Remove Exchange 2010.
Tip: Exchange will protect itself! If you properly uninstall via Add/Remove Programs, it will ensure that it is ready to be uninstalled via Readiness Checks! If all the above prep work is completed before hand, it should uninstall just fine.
After Uninstall of Exchange 2010
After uninstalling Exchange there will be some general “housekeeping” tasks. These may vary depending on the steps taken during your upgrade and depending on your organization’s operational requirements.
Examples include:
- Removing the legacy Exchange computer accounts from AD (including the DAG’s Cluster Name Object and any Kerberos ASA object).
- Removing the legacy Exchange name records from DNS (including the DAG’s Cluster Name Object and any Kerberos ASA object).
- Ensure the folder on the DAG file share witness (FSW) servers were successfully removed, possibly removing Exchange’s rights on the server if it isn’t serving double duty for Exchange 2016.
- Removing old load balanced IP addresses and routes from your network load balancer.
- Remove old firewall rules that open ports to Exchange 2010 environment.
- Removing and disposing of the legacy Exchange environment’s physical equipment.
- Deleting of the legacy Exchange environment’s virtual machines.
Conclusion
With the uninstall of the last server, hopefully Exchange 2010 treated your organization well. The Exchange product team takes great pride of the success of the platform and hope that you see the same success with Exchange 2016 (or Exchange Online!). Messaging sure has come a long way since it was released way back in 2009.
REFERENCES
Exchange Team Blog article on Decommissioning Exchange 2010 On-Premises