
Hello. I have had different ways and parts to updating an SSL certificate for your website. Now most are required and commonplace these days, especially if you run a business. I had always had issues creating the CSR properly with a private key so that I could convert the certificate to a PFX extension certificate with a private key for IIS intallation.
This blog article will go through the steps to properly create a multi domain CSR with a private key so that you can convert the CRT and Key back into a PFX file to use on IIS for your websites.
Things to know before you begin
- Have access to your DNS provider.
- You might need to add a record to your DNS for validation or confirm IP address for your A record.
- Know your validation method and prepare to validate your domain
- Have the proper email address setup and working to have the Certificate Provider send the validation email to for EACH DOMAIN in your SAN certificate CSR.
- Have OpenSSL installed or some other certificate tool.
- Windows Download Link Here
- OpenSSL can perform all of the tasks in this blog article accept the installation part. You do that in IIS.
- REVIEW REVIEW REVIEW
- Double check all your work to make sure there are NO TYPOS. Errors will delay the issuance of a certificate and cause many problems with validation.
Creating the CSR and Private Key Pair Files
I have never been able to successfully do this like I wanted to from IIS or Windows. (Please, if you have a method in IIS or certsrv utilities to do it, share with us!) I use OpenSSL to create the configuration file that will generate the CSR and Key file to submit to the Certificate Providers.
- Create an OpenSSL configuration file (e.g. req.conf) and fill out the details for your CSR. Fill out all the fields with the proper information. I am going to assume you have knowledge of what the fields represent. Save that file to a directory (i.e. C:\Certs\req.conf)
1 2 3 4 5 6 7 8 9 10 11 12 13 14 15 16 17 18 19 20 21 | [req] distinguished_name = req_distinguished_name req_extensions = v3_req prompt = no [req_distinguished_name] C = US ST = YourState L = YourCIty O = YourOrganization OU = YourOrganizationUnit CN = www.domain.com [v3_req] keyUsage = keyEncipherment, dataEncipherment extendedKeyUsage = serverAuth subjectAltName = @alt_names [alt_names] DNS.1 = www.domain.com DNS.2 = domain.com DNS.3 = sub-domain.domain.com DNS.4 = sub2-domain.domain.net DNS.5 = www.domain.net |
- Next, run the following command from OpenSSL to generate the request (.req) file and corresponding certificate key file (.key) in the C:\certs directory
1 | openssl req -new -out C:\certs\yourrequest.csr -newkey rsa:2048 -nodes -sha256 -keyout c:\certs\yourprivatekey.key -config c:\certs\req.conf |
Note: Multi-domain certificates do not support www subdomains by default. If you need to secure both www.example.com and example.com with one Multi-Domain certificate, both hostnames should be specified during the certificate activation.
Validate and obtain your Certificate
Based on the Certificate Provider you go with, you will need to go through a validation process with your CSR and domains to get them approved for certificate use based on the type of certificate you purchased. If you have issues with this part, you will need to work with your Certificate Provider to resolve and remediate those issues before continuing.
You will have a screen like this should you have successfully obtained a certificate:
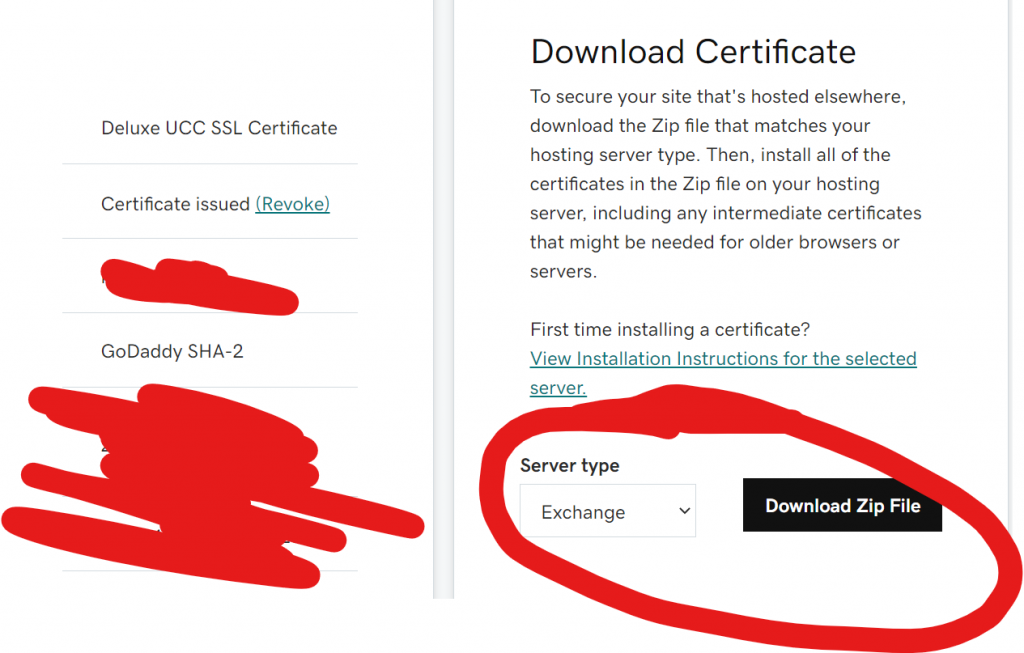
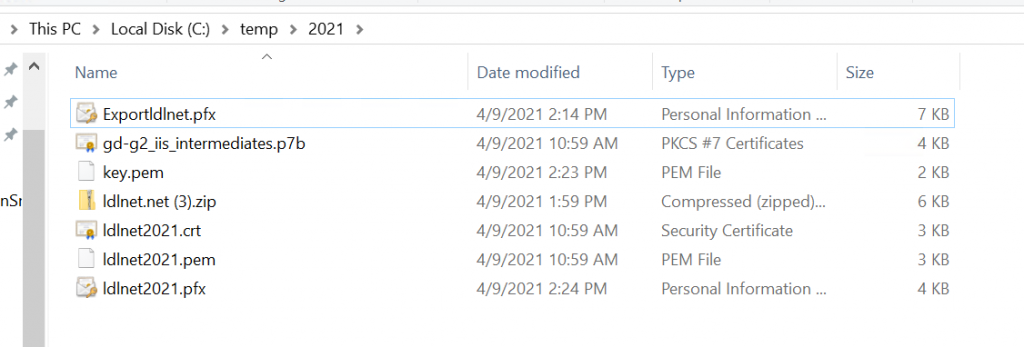
NOTE: The Certificate will come in a zip file. The actual certificate will be in another format (either .csr or .crt or .p7b) Extract those files to the working directory on your server (i.e. C:\Certs)
Convert the Certificate to a PFX file using OpenSSL
Now that you have your certificate, IIS will not use it for your website until it knows it has a private key associated with it to bind to in IIS. We created the key in the upper section of this blog post. Now we will use that key file and the new crt file to make the required PFX file for use in IIS.
- Run the following command in OpenSSL to make a new PFX certificate using your private key and the downloaded certificate.
1 | openssl pkcs12 -export -out c:\Certs\FinalPFXCert.pfx -inkey c:\Certs\YourPrivatekey.key -in c:\Certs\downloadedcert.crt |
You will be asked to create a password for the new certificate. REMEMBER THE PASSWORD! If you lose the password, you cannot export the certificate or private key and will have to recreate the certificate from scratch.
You will now have new certificate called FinalPFXSCert.pfx in your C:\Certs directory.
Import the PFX Certificate into IIS
This is the final step to add the certificate to your website. Make sure you test the bindings when completed to make sure all the SAN names work!
- Open IIS Manager > Server >Server Certificates
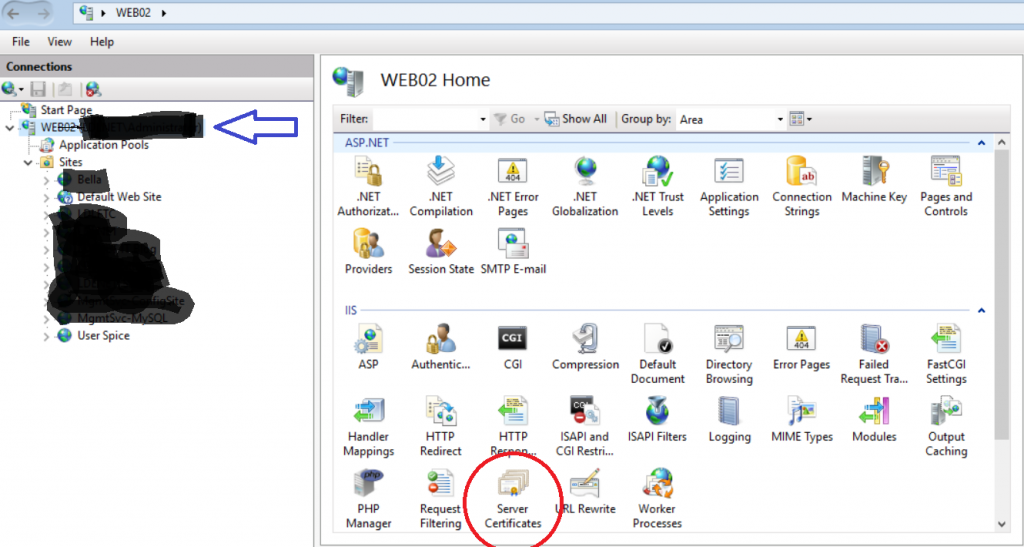
- In the Server Certificates Screen, Goto Actions > Import
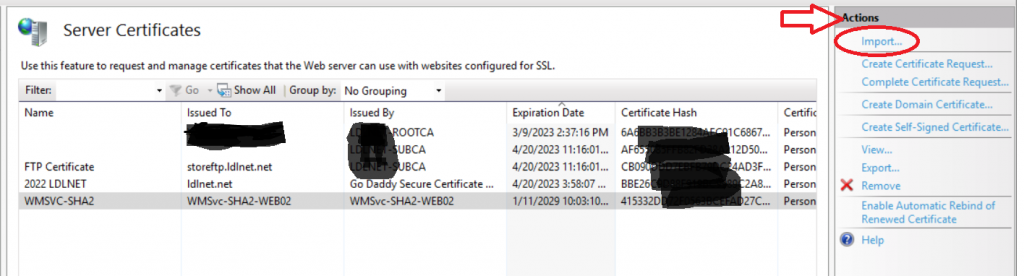
- Choose the path to the PFX file using the ellipses (…) or type the path to the PFX file (i.e. C:\Certs\newcert2023.pfx) > Type in the Password for the certificate in the Password field that you chose when creating the certificate > Click OK
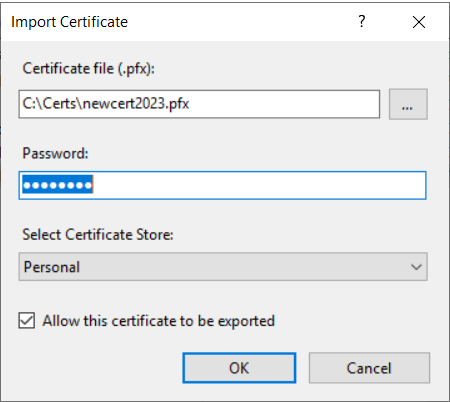
NOTE: You will want to place the certificate in the Personal Store as that is what the computer account uses to read available certificates in IIS.
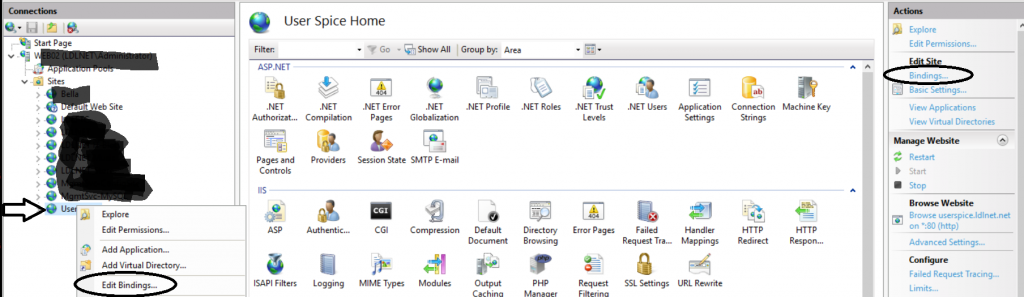
Assign Certificate to your Website in IIS
This is the final step to activate your certificate with your website.
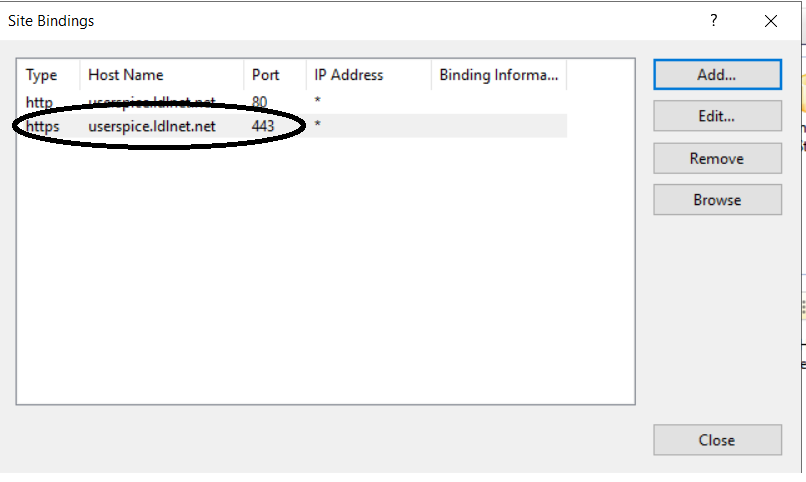
- In IIS Server Manager, choose your website in the Sites List > Right-Click the Site > Choose Edit Bindings
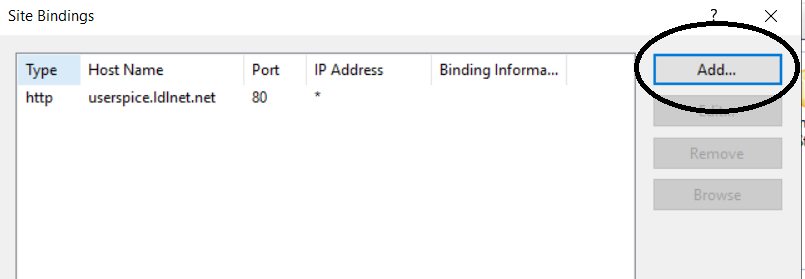
- Click Add
- Choose HTTPS in the dropdown > Type in the SAN name you want to bind the certificate to (i.e. www.domain.com or domain.com) in the Host name box > Choose the Certificate Name in the SSL Certificate dropdown list > Click OK
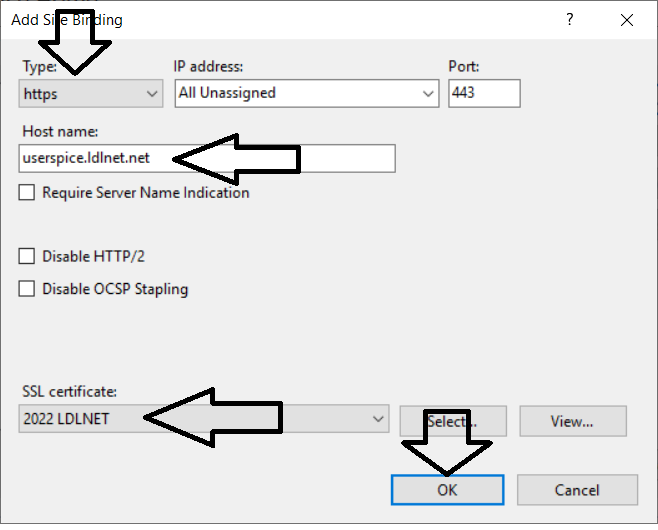
- You will now see the https binding listed for that domain. REMEMBER to repeat this for the other SAN domain names in the certificate and apply them to all relevant websites.
I hope this helps some of you out there with the certificate stuff. Over the years, certificates have been a real pain to manage, but I think this post and my other posts in this series will help simplify the process for you all.
THANKS FOR READING AND BEING A PART OF LDLNET!
I WELCOME THE NEW YEAR WITH GUSTO!
CONTACT ME FOR ANY QUESTIONS!
About Lance Lingerfelt

Lance Lingerfelt is an M365 Specialist and Evangelist with over 20 years of experience in the Information Technology field. Having worked in enterprise environments to small businesses, he is able to adapt and provide the best IT Training and Consultation possible. With a focus on AI, the M365 Stack, and Healthcare, he continues to give back to the community with training, public speaking events, and this blog.