WHAT IS THIS ALL ABOUT?
Historically we only had two primary ways to structure sites in SharePoint. You would either create one big site collection and create lots of subsites in it, or you would have lots and lots of site collections in your tenant. Of course, you could have both models run in parallel. Provision lots of department sites each in its own site collection and lots of subsites in each department’s site collection. Multiple Site collections always made sense for large organizations. With the arrival of SharePoint Online and Office 365, we had many small businesses embrace SharePoint now and most small, and even medium-size businesses could get away with just 1 or 2 site collections. What made a single site collection really attractive to many is that you could easily build common navigation between all the subsites. On top of that, you could also create site templates and reuse them.
Things started to swing in favor of flat architecture with the rollout of Office 365 Groups and Communication Sites. Every time you create an Office 365 Group or a Communication site – a new site collection is provisioned. So whether you want it or not, now you are almost forced into a flat architecture.
WHAT ARE HUB SITES?
So now, with all these Office 365 Groups and Communication Sites and old legacy site collections, the challenge is how do we bring them all together via common navigation? I documented several ways to create common navigation for sites previously, but all of the tricks are local to the site collection. Meaning, if you create navigation in one site collection, you can only propagate it to subsites underneath, not to other site collections..
This is where Hub Sites come in. Hub Sites are a way to tie together all the autonomous site collections under one navigation umbrella. There are other characteristics that are shared within a Hub , but primarily – they are for navigation.
HOW TO CREATE HUB SITES
So now that we are clear what the Hub Sites are, let me show you how to create them! There are 2 steps involved.
- Step 1: You need to pick a site that will be the main hub – that’s where you will manage the global menu from (think of this as an older brother) and…
- Step 2: You need to associate other site collections to the hub site (think of them as brothers and sisters joining the older brother).
Step 1: Register Hub Site
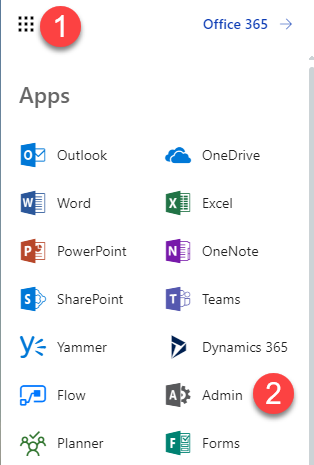
- Navigate to Office 365 Admin Center
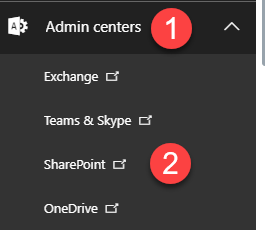
- Click on SharePoint Admin Center
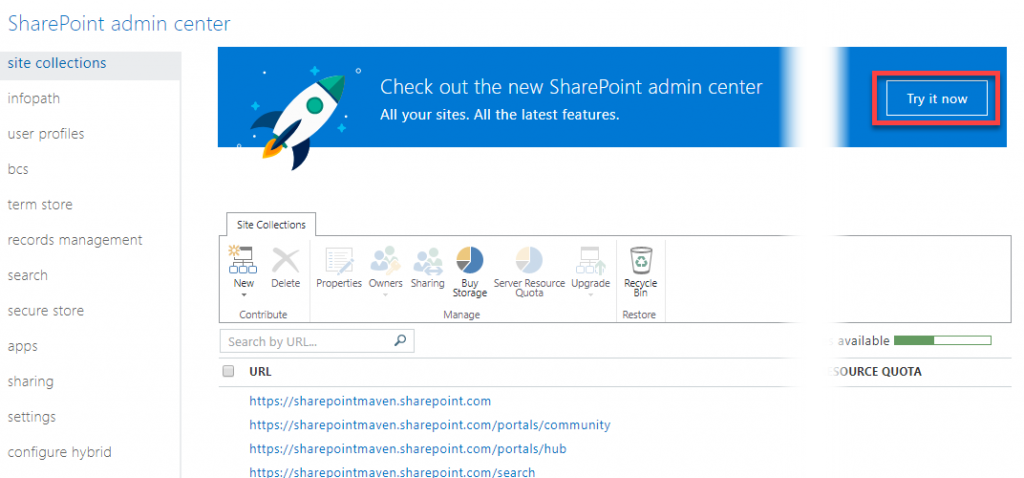
- Navigate from Classical to Modern SharePoint Admin Center by clicking “Try it now” button. NOTE: This step is and will only be necessary for a short period of time. Microsoft is currently modernizing SharePoint Admin Center (and you can only create Hub Sites from Modern SharePoint Admin Center). As of the writing of this post, we are still in transition mode, but in future, when the transition is complete, you can just skip this step.
- Click on Active Sites to see a list of all the site collection you have (Office 365 Group Site Collections, Communication Site Collection, legacy (classical) site collections)
- Click the check box next to the site that will become a hub, then Register as Hub Sitefrom Hub Site menu
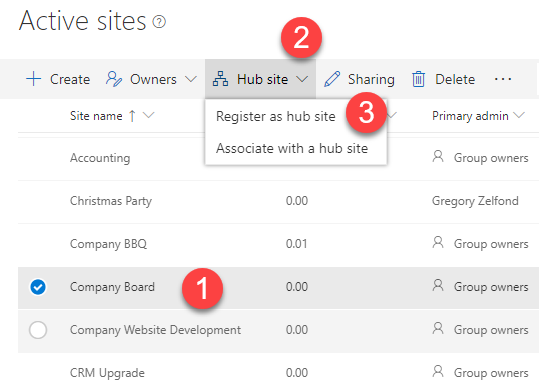
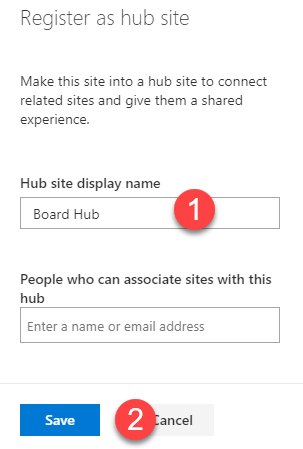
- Fill in the name of the Hub and click Save (you can also designate users who will be able to connect to this Hub, but let’s not worry about it here)
Mazel Tov, you just created your first Hub Site!!!
Step 2: Associate a Site to a Hub
The next step is for you to associate (connect) other site collections to the Hub. There are two ways for you to do so:
Option 1: Connect from the SharePoint Admin Center
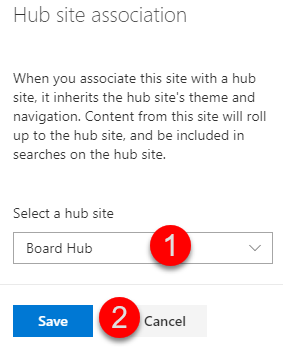
- While in SharePoint Admin Center, click on the checkbox next to the site collection you want to associate with the hub, then from the Hub site drop-down menu chooseAssociate with a hub site

- From the list of all the hubs you have available in your tenant, choose one you want to connect to and click Save
Option 2: Connect from the site collection itself
- Navigate to the root (the very top-level site) of the site collection that you want to associate with the hub
- Click Gear Icon > Site Information
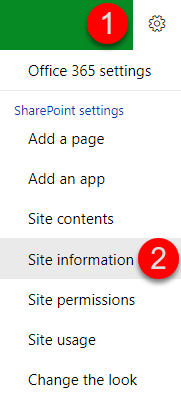
- Choose Hub Site Association and click Save
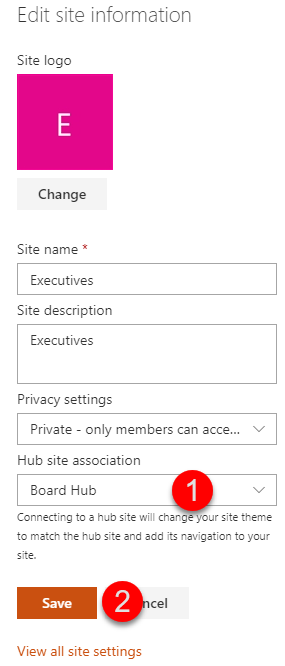
NOTE: This second technique only works for site collections that have been modernized. That means that if you have a classical site collection with a classical page, you won’t see the Site Information in the menu under the gear icon. So what you will need to do first is modernize your page first. It is quite easy, and I described how to do it here.
CONFIGURE HUB
Assign a Hub Name and Upload a Hub Logo
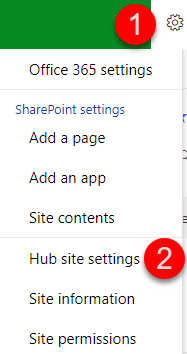
There is a bit of configuration you can also do to a Hub once created. If you go back to the main Hub Site, then click Gear Icon > Hub Site Settings…
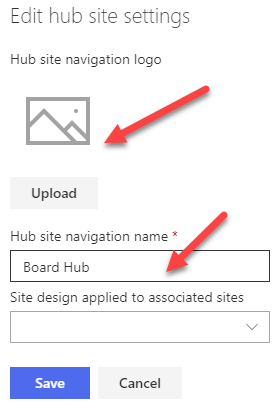
…you can upload a Hub logo and specify a navigation name for the Hub.
Don’t mind the Site design drop-down – it is way too technical for us, out of the box guys and girls.
Here is what this all means:
- Hub Logo: Appears as a little thumbnail on the Hub Global menu to the left of the navigation. Clicking on the Hub Logo from any site collection navigates the user to the main Hub Site
- Hub Site Navigation Name: This is how the name of the Hub will appear in the global navigation. So does not really matter what you called your main hub, you can call it something else in the navigation (i.e. Intranet)
Build Common Navigation
This step is primarily the reason why we did all of the above. Associating (connecting) all the site collections to the hub, does not automatically add links to the navigation. You have to do so manually. Let me show you how to do this.
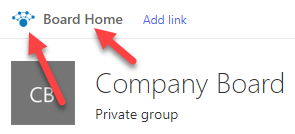
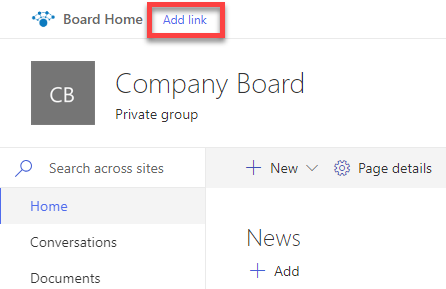
- Navigate to the main Hub Site again
- Click on Add link
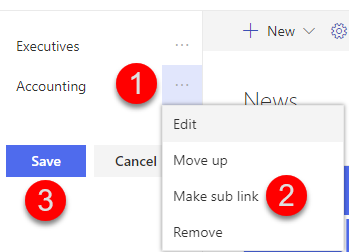
- Click the “+” sign to add a new link, fill in the blanks. Click OK and Save
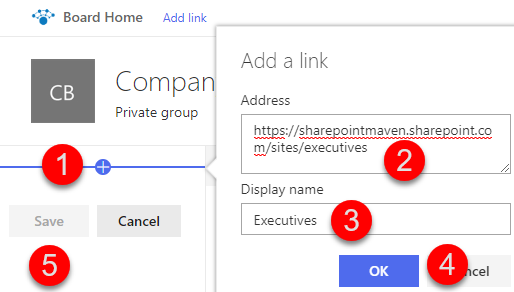
- You can also create drop-down menus by doing sublinks
Take advantage of Hub Features
Here I would like to list all the advantages of the Hub functionality. At the moment, the list is not big. However, I am sure as Hub Sites evolve, there will be other features added.
Common Navigation
We already covered it above, so not going to repeat it here.
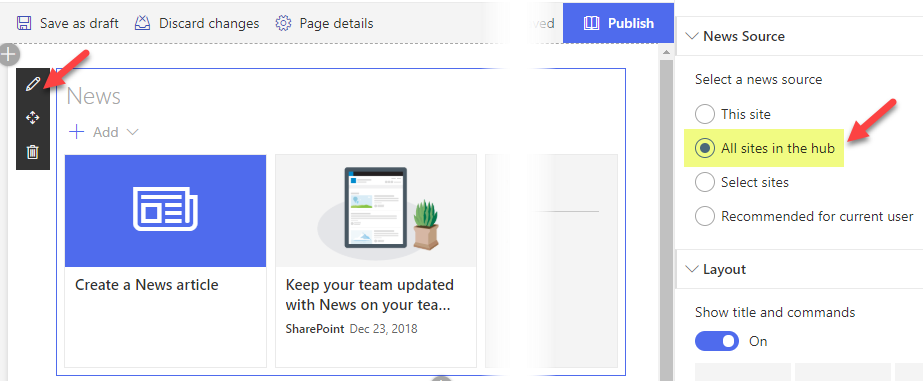
News roll up
When you combine your site collections into a Hub, you can automatically aggregate News and Announcements from all the sites into 1 site by using News Web Part. Go ahead and add a News Web Part to a page on the main Hub Site. Click the Edit Button. There you will be able to choose an option to aggregate all the news within a Hub into one!
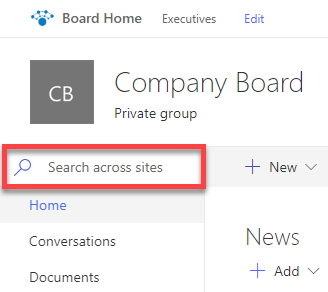
Search within a Hub
Once you create a Hub and connect other sites to it, you will notice that a Search Box on the Main Hub now searches across other sites within a Hub. This is amazing!
Common theme
You will notice as soon as you add your site collection to a hub, that its color scheme will adopt the colors of the main Hub. That’s pretty nice – great from common branding/user adoption standpoint.
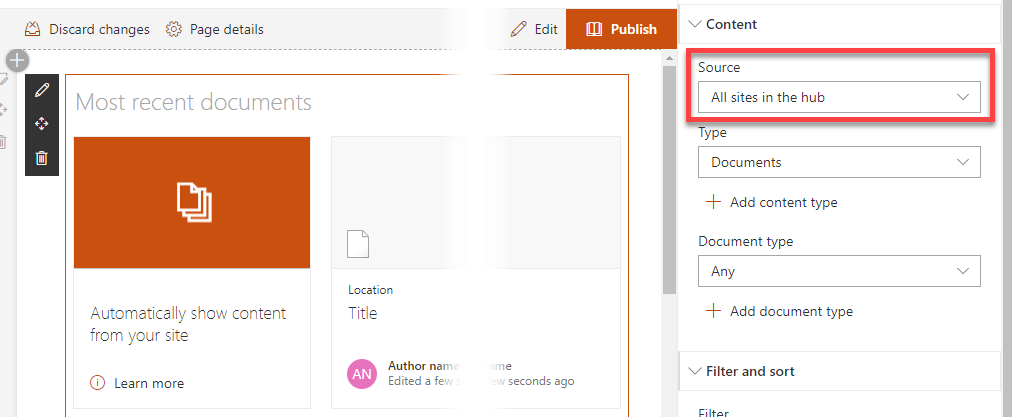
Content roll-up via HCWP
Once you create a Hub, you will be able to roll-up content using Highlighted Content Web Part (HCWP) within a hub.